Last Sunday I attended a free tutorial at
Z Frabrics on how to make an umbrella. I love umbrellas and was intrigued. In a nutshell, you use an old umbrella, a cane style, not one that is compact. You remove the nylon fabric being carful to save at least one panel. You use a seam ripper to obtain one panel and that is your template for all eight panels.
Small O rings are used at the top along with some clear chalking gel from the hardware store. The best fabric to use is that lovely newer laminate cotton. It's more flexible than oil cloth and is BPA free. You can use regular fabric and then either use some sort of spray to seal it or not. You could also use lace for a parasol... Oh the possibilities.
The next day I found this cute umbrella in Salvation Army for $2. It was made in Japan and was a funny compact umbrella, folding upwards. I figured out how to not fold it all the way so it's compact but just fold it part way. It works! I got to work.
I still need to seal the top but for now I just like opening and closing it and scrutinizing my seams. I bought the rain drop fabric at Z Fabrics a while ago. Maybe a year? Maybe more? The small polka dots I got at a shop in Cliften, Connemara, Ireland. The two work well together. This Sunday I'll be stopping by my favorite flea market for more umbrellas and then I just need to find the right fabrics. Look for them in my etsy shop soon:):):):):)

I was planning on inserting the link here but once I got to the website, I could not find the pattern anywhere. I assume it was a free pattern as we all got hand outs at the tutorial. However, after doing a quick search for other umbrella patterns, there are a ton out there including one by Martha Stewart. But really, if your crafty enough, and determined enough, you can figure it out. All you do it take a part the old fabric, form the 8 panels, and attach them back on the same way the old fabric was. With the addition of the sealing on the top, it's really easy.
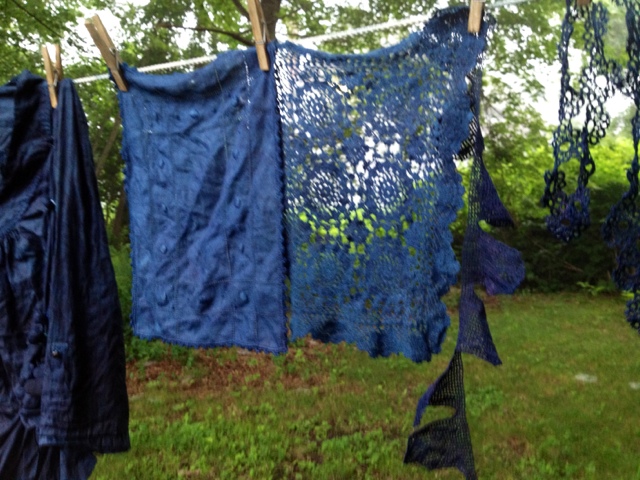
Since I've been home and in preparation for teaching at
Medomak in a few weeks, I've been itching to start indigo dyeing. Two days ago I created my vat using a super easy recipe from another fiber artist here on the Island. If you'd also like the recipe, let me know in the comments and I'll happily email it to you.
I gathered a huge pile (probably too much) of bits and bobs that I wanted to give a face lift to.
I even tried my hand at
Shibori. A lot like tie-dyeing if you ask me. Speaking of which, I'll be going to my mother's for a family fun day on Sunday where we and all 6 of the littles will be tie- dyeing. I'm going to give this technique another go.
Lots of old white or fugly handspun I've had for years. I also have LOOOOOOADS of linens I've collected and that my grandmother keeps giving me.
Really really pleased and happy with the results. Stay tuned to see what I'll be doing with all these bits and pieces. Also more dyeing to come.


3 comments:
oooh, I love the look of the indigo crochet! fun fun!
Thanks Juliette! It was so fun and can't wait to do more:)
Looks like such beautiful pieces! Jus love the colors!!
Post a Comment